TL;DR
Glazing results depend on far more than the glaze itself: thickness, application method, edge treatment, clay body, and firing conditions all shape the finished surface, color, and feel.
Layering Glaze: Creating Surface Variation
Layering means applying different glazes, or different coats of the same glaze, to the clay body in sequence. After firing, the layers may create variations in color, gloss, or flow. It suits creators who want to observe combinations, but the result is often harder to predict than a single glaze layer.
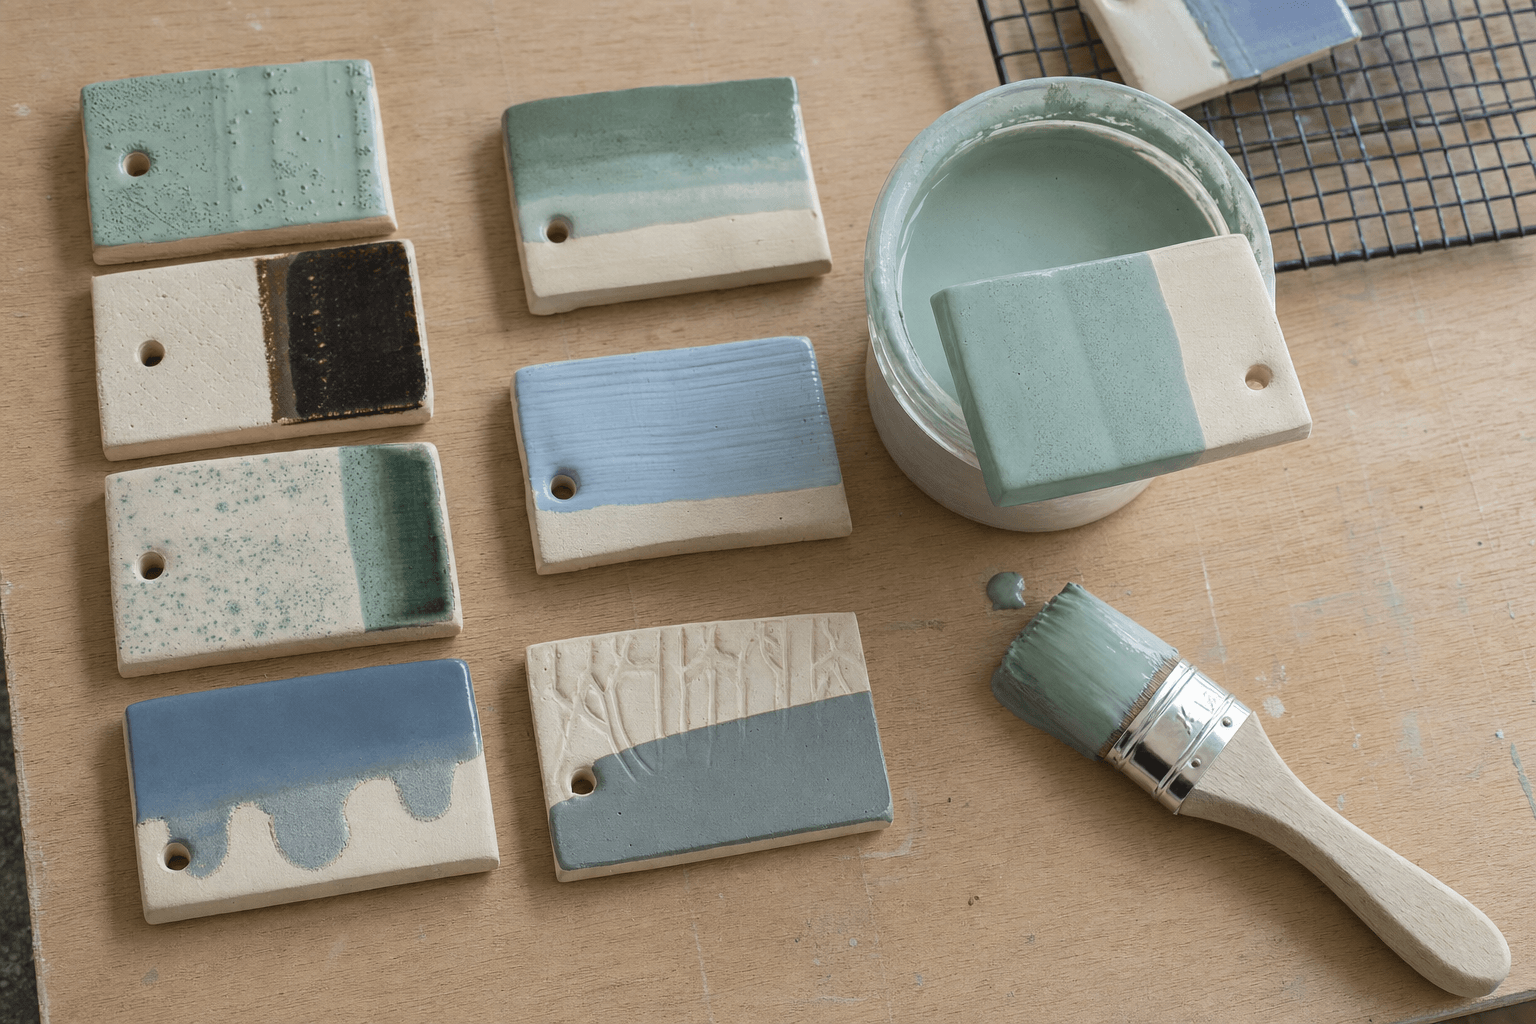
You can begin with a small, flat test tile and record the order of each layer, the areas covered, and the application method. Do not change the clay body, glaze, thickness, and firing program all at once, or it will be difficult to determine the cause when something goes wrong. When layering, pay particular attention to edges and recessed areas, because the glaze may develop differently there than on flat surfaces. After testing, record changes in color, surface, edges, and bottom, then decide whether to adjust the next test tile.
Variables Worth Observing
A single combination can be arranged with several thicknesses or coverage areas so you can compare the relationship between glaze layers. If the surface shows unexpected flow, buildup, or a color different from what you expected, do not simply attribute it to “a bad firing”; first check the clay body, glaze, application thickness, and firing record. Only specific observations can help you make targeted changes next time.
Brushing Glaze: Controlling Areas and Layers
Brushing glaze is suitable for local areas, details, and designs that need to retain clear boundaries. During brushing, glaze thickness and brush marks may become part of the surface, so the motion, direction, and number of repeated applications are all worth recording. To achieve a more even area, use a consistent direction and coverage range; to retain handmade marks, you can intentionally let brushstrokes contribute to the final effect, but still confirm the result with a test tile first.
The advantage of brushing is its relatively high level of control, making it easier to avoid areas where you do not want glaze and convenient to combine multiple areas on the same piece. Its limitation is that coverage uniformity depends more on the application, and complex shapes or broad surfaces may require more patience. Before glazing, confirm that the clay body is clean and free of obvious dust; after glazing, check the bottom and the areas that will contact kiln furniture to avoid leaving unwanted glaze.
Dipping Glaze: Quickly Covering Large Areas
Dipping glaze means allowing the clay body to contact glaze slurry so that a larger area receives continuous coverage. It suits pieces with relatively clear forms that need to maintain an overall color field. The actions of dipping and lifting affect how the glaze is distributed on the surface, so each test should use a similar process whenever possible, while recording the condition of the glaze slurry and how the piece was handled.
The advantages of dipping are efficiency and an overall look; the challenges are that edges, grooves, and inner and outer walls can easily develop different thicknesses. After lifting the piece out, check for pooled glaze, bare spots, or drips, and clean the bottom before loading it into the kiln. For pieces with complex shapes, dipping may not necessarily be easier than brushing; which method you choose depends on the piece’s size, structure, glaze condition, and the degree of hands-on control you want to retain.
Wax Resist: Preserving Boundaries and Unglazed Areas
Wax resist creates a temporary barrier in designated areas so glaze is less likely to cover them. It can help preserve lines, edges, patterns, or specific unglazed areas, and it can also be used with brushing or dipping. The key to wax resist is not simply “applying wax,” but first planning which areas should be preserved and whether the boundaries need to be neat.
Before use, you can test the continuity of the wax layer and the boundary effect on a test tile. If the wax is applied incompletely, glaze may enter the gaps; if the boundaries are overly complex, cleaning and inspection will also take more time. After glazing, carefully check the bottom, pattern edges, and wax-resist areas, then handle them according to the material instructions. Do not treat wax resist as a way to cover up surface problems; it is better suited to serving a clear composition and process plan.
How to Build Your Own Glazing Test Process
First choose a test tile made from a clay body similar to the one used for the finished piece, and leave enough room to record the glaze name, layers, thickness, and firing information. Change only one major decision at a time, such as the application method, number of layers, or coverage area. After firing, observe whether the surface is even, whether the color meets expectations, whether the edges show changes, whether the bottom is clean, and whether the feel suits the intended use of the piece.
Look at the Results Before Changing the Process
Testing is most useful when you can describe the result specifically. Record changes in the fired surface, fit, and color, then change only one decision on the next test tile. If the result is unsatisfactory, do not rush to add more glaze layers or replace all the materials; review the records and identify the variable most likely to have affected the result.
Different methods can also be combined, but before combining them, you should first understand how each method performs on its own. Layering can add variation, brushing can handle local areas, dipping can provide overall coverage, and wax resist can preserve boundaries; there is no fixed order of priority among them. The process that truly suits you usually comes from the interaction of your clay body, glaze, kiln, and work habits. Treating each test as a repeatable observation will gradually help you establish a more stable glazing method, along with more personal judgment.
Continue reading: A Practical Guide to Sharpening and Maintaining Pottery Trimming Tools
Keep this nearby while you make, then let the next piece be your own.