TL;DR
Centering clay on the wheel becomes more repeatable when your body is braced, the wheel turns steadily, and your hands apply inward and downward pressure without chasing the wobble. Start with securely attached clay, use only enough water to prevent dragging, and change one part of your setup at a time.
Why does centering clay on the wheel feel impossible?
A spinning lump pushes back against your hands unevenly. If your elbows float, your wrists bend under pressure, or your body shifts, the clay can move your hands instead of your hands moving the clay.
The goal is not to overpower the lump. It is to create a stable path that redirects the clay toward the wheel’s axis. Your lower body and torso provide the stable structure; your hands become the final contact points.
Before starting:
- Place the clay close to the middle of a clean wheel head or bat.
- Press or slap it down firmly enough that it does not slide when rotation begins.
- Sit close enough that you are not reaching with straight arms.
- Keep both feet supported rather than balancing on the pedal foot.
- Adjust the stool or wheel position if your shoulders rise while you work.
If you are still deciding whether a wheel fits your body and workspace, compare foot-pedal placement, wheel-head height, and seating options alongside the current wheel and clay options.
How should you brace your hands and body?
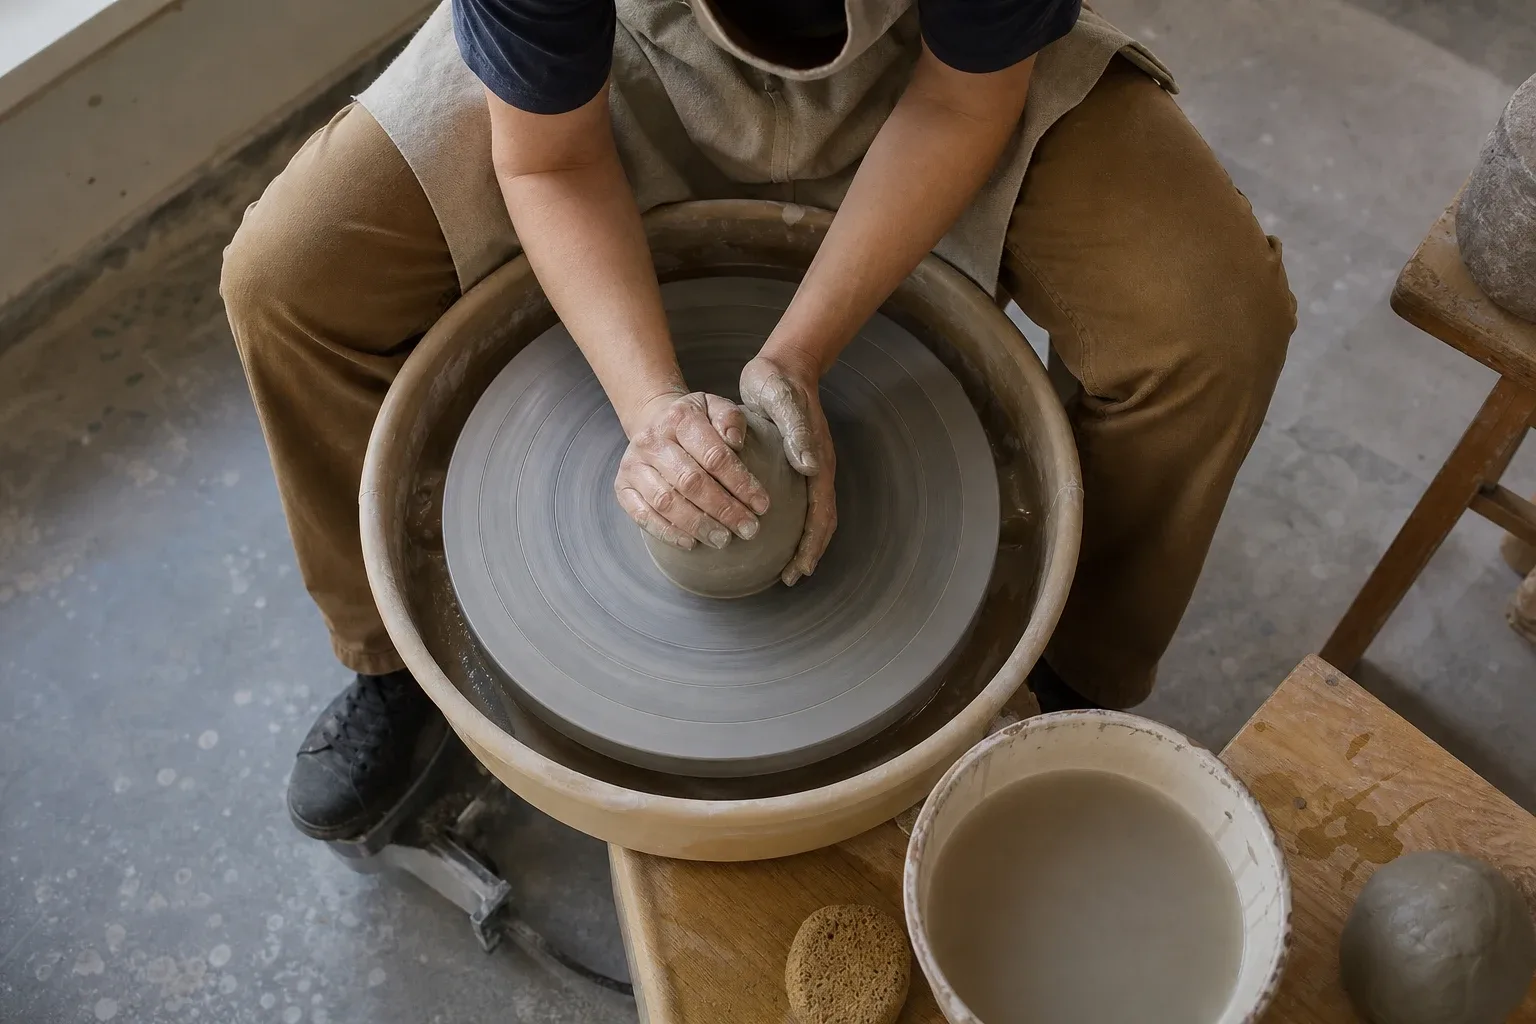
Build a chain of support from the floor to the clay. Keep your feet stable, bring your elbows against your thighs or hips, and connect your hands so they work as one unit. The exact contact points depend on your proportions and wheel position.
One hand can provide inward pressure against the side while the other controls the top and supports the first hand. Keep the wrists relatively firm. Pressure should build gradually and remain steady through several rotations rather than arriving as a series of quick pushes.
There is no single universal hand pose. In an observational study, Five expert Nepalese potters produced three familiar pottery types in five specimens each. Researchers identified 31 different fashioning hand positions. That work examined broader forming behavior rather than determining the best centering posture, but it shows why copying the appearance of one potter’s hands is less useful than finding stable brace points that suit your body.
A practical check is to briefly reduce your pressure without removing the brace. If your hands immediately bounce with the clay, strengthen the connection between your elbows, torso, and hands before pushing harder.
What wheel speed and water level work best?
Use a steady, moderately fast speed for the initial centering work. The wheel should complete rotations smoothly enough that you can maintain continuous pressure. Very slow rotation can make each high spot feel like a separate impact, encouraging you to chase it. Excessive speed can magnify poor bracing and throw slurry outward.
Reduce speed as the clay becomes centered and when you move into opening or pulling. The pedal change should be deliberate rather than an automatic response to every wobble. Potters using unfamiliar controls can practice gradual pedal changes without clay first; more pottery wheel setup and maintenance guides can help with the surrounding studio workflow.
Water is lubrication, not the centering force. Wet your hands and the clay’s surface at the start. Add another small amount when your hands begin to drag, chatter, or pull at the surface. Do not add water simply because the clay is still off-center.
A glossy layer that immediately runs into the splash pan is usually more than the contact needs. Prolonged wetting can leave the outer clay softer and harder to control. If the surface has become very slippery, remove your hands, slow or stop the wheel, clear excess slurry, and resume with a light film of water.
Which three mistakes cause most centering failures?
1. Chasing the moving side. Moving your hands in response to every bump reproduces the wobble. Brace first, then hold steady pressure while the clay passes beneath your hands.
2. Using pressure without a clear direction. Side pressure alone may push the lump across the wheel head. Top pressure alone may flatten it without controlling the side. Combine inward pressure with downward control so the clay moves toward the axis and stays attached.
3. Adding water instead of fixing the brace. More water can temporarily reduce friction, but it cannot stabilize moving elbows or disconnected hands. When a wet lump still bucks against you, pause and reset your posture.
Also distinguish a centering problem from poor attachment. If the entire lump slides across the wheel head, stop the wheel and reattach it. Trying to catch a sliding lump at speed is not productive.
Notice the result before changing the process
A test is most useful when the observation is specific. Record what the surface, fit, and color look like after firing, then change one decision at a time in the next sample. At the wheel, apply the same principle to movement: identify where the wobble appears, then adjust one control.
Use this repeatable practice test:
1. Prepare three similarly sized balls from the same clay batch. 2. Use your normal wheel speed and water routine for the first ball. 3. For the second, keep those choices but establish firmer elbow and hand brace points. 4. For the third, retain the improved brace and add water only when drag becomes noticeable. 5. After each attempt, hold a stationary finger just outside the clay without touching it. Watch whether the gap changes as the wheel turns.
A changing gap near the base points to incomplete side control. A steady base with a moving top suggests uneven top pressure or a tilted upper section. If the whole profile looks steady but your hands still feel rhythmic bumps, check for surface irregularities before applying more force.
Keep the clay amount modest while diagnosing technique. Once the process feels repeatable, increase the amount gradually instead of changing clay size, speed, posture, and water use together.
FAQ
Should I center with one hand or two? Two connected hands usually give a beginner clearer inward and downward control. One-handed methods can work, but they demand a particularly stable brace and are not necessary for learning the basic force directions.
Why does the clay become centered and then wobble again? You may be releasing pressure abruptly, changing pedal speed while your hands are still engaged, or shifting your elbows. Ease pressure away over several rotations while keeping your hands connected.
Do I need to cone the clay up and down? Coning can help organize the lump and reveal uneven pressure, but it is not a substitute for bracing. Use it as part of a repeatable routine rather than repeatedly coning a clay surface that is becoming too wet.
Can clay be too hard or too soft to center comfortably? Yes. Very firm clay requires more force, while very soft clay deforms easily under inconsistent pressure. Practice with clay that is even in consistency and free of obvious dry sections so you can evaluate your technique rather than compensating for the material.
Keep this nearby while you make, then let the next piece be your own.